Welcome to Fortis Merchant Dashboard This comprehensive guide will help you navigate and make the most of your Fortis merchant dashboard. Learn how to manage sales, inventory, customers, and more.
Getting Started Login to Your Dashboard Visit https://my.fortis.world/ to access your Fortis Dashboard.
Need login credentials? Contact us at: customer.success@fortis.world
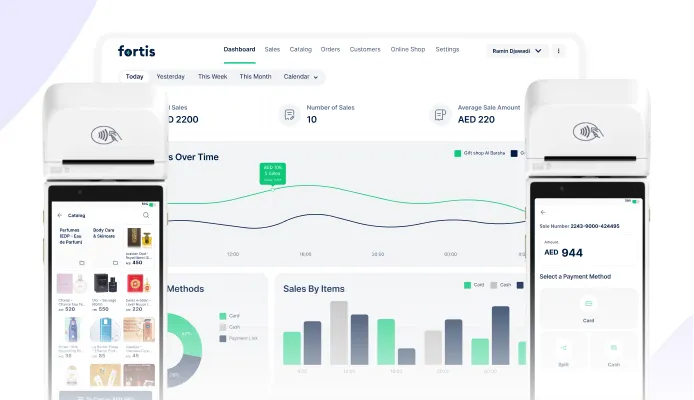
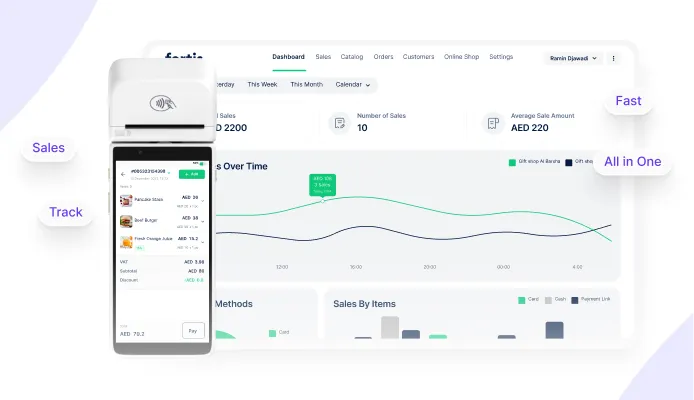
Dashboard Overview Once logged in, you'll see your Dashboard Overview with key metrics:
Sales Activity Graph - Visual representation of your sales trendsNumber of Sales - Total transactionsPeak and Quiet Hours - Understand your busiest timesAverage Sale Amount - Track your typical transaction valuePayment Method Distribution - See how customers prefer to payPro Tip: Use the time period filters to analyze different timeframes and identify sales patterns.
Sales Tab Pro Tip : Use this tab to monitor all sales transactions, track payment status, and identify orders that need follow-up.
Track and manage all your transactions in one place.
Features
Filter Button - Refine your transaction listSearch Bar - Quickly find specific transactionsGet Reports Button - Export sales dataTime Filters - View by today, this week, or this monthPayment Status - See Paid or Not Paid transactionsPayment Method - Filter by Card or CashUse this tab to monitor all sales transactions, track payment status, and identify orders that need follow-up.
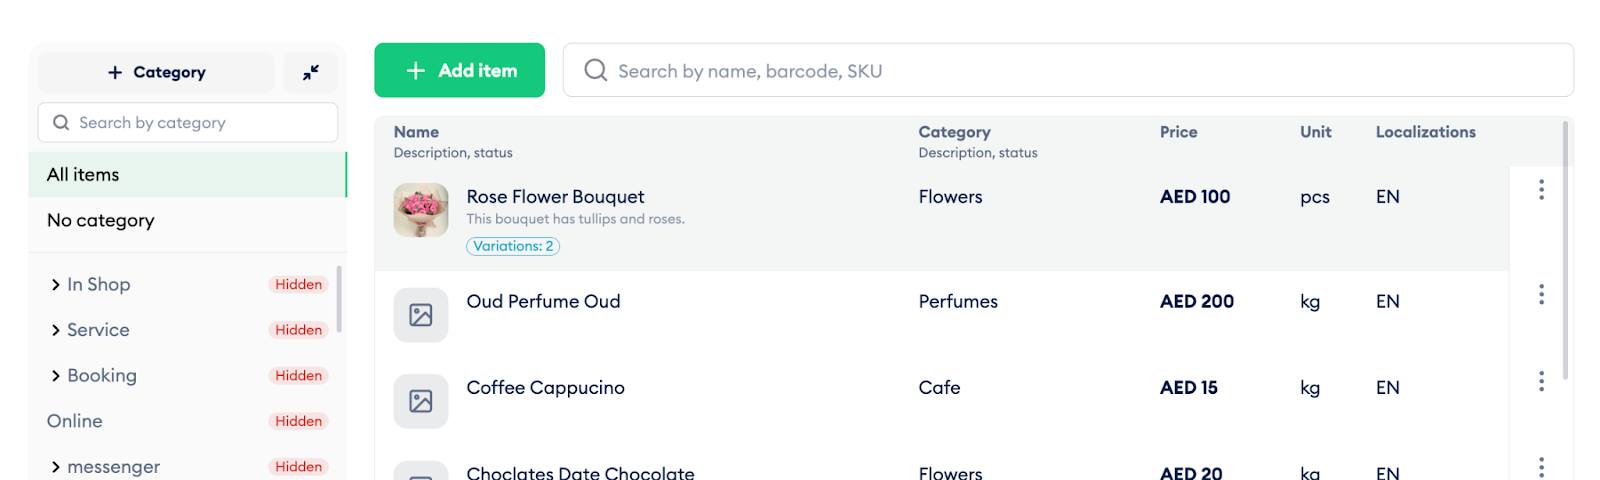
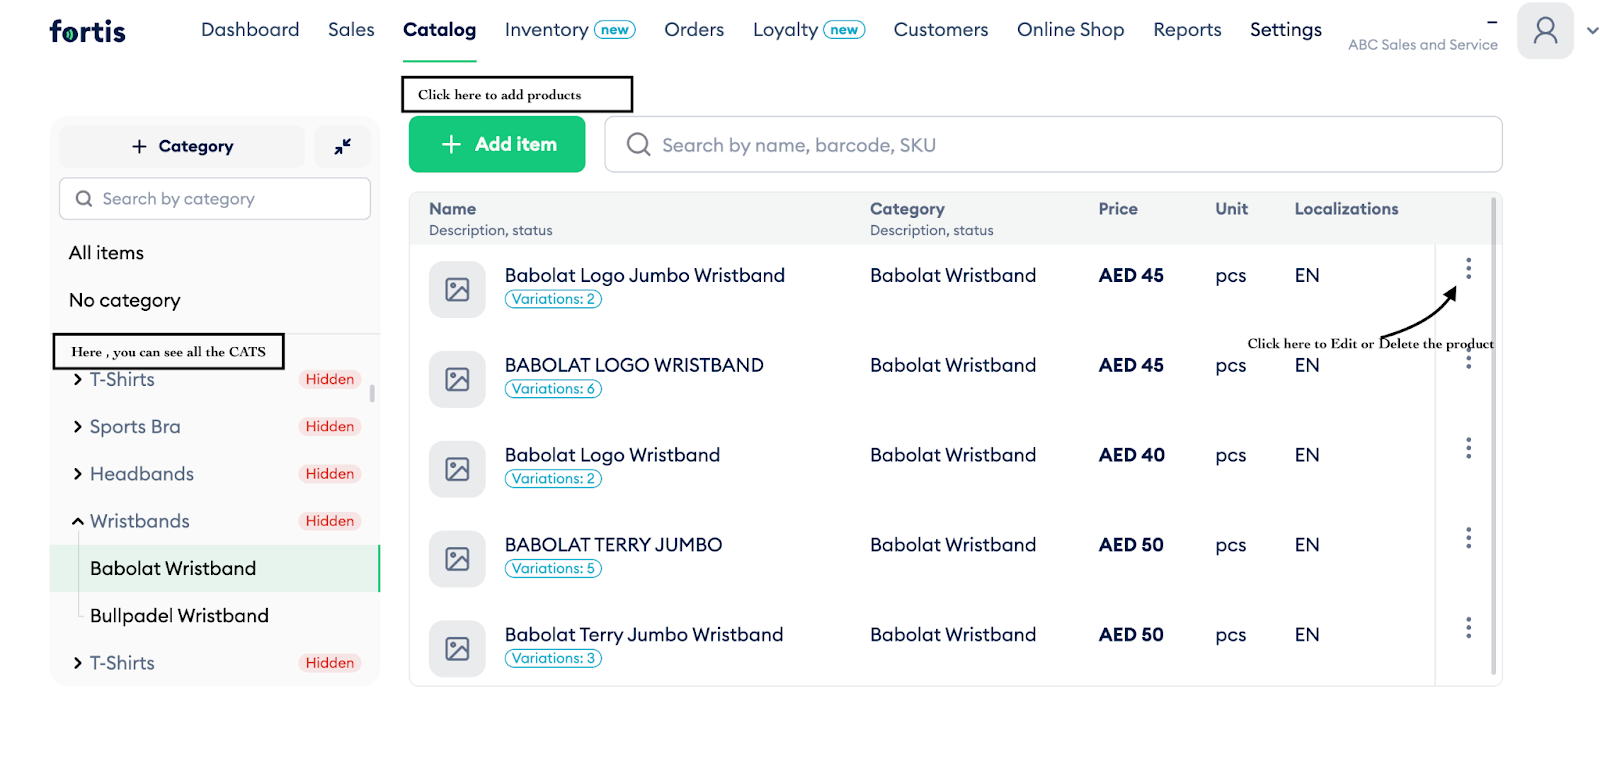
Product Catalog Manage your products and organize them into categories for easy access on your POS device.
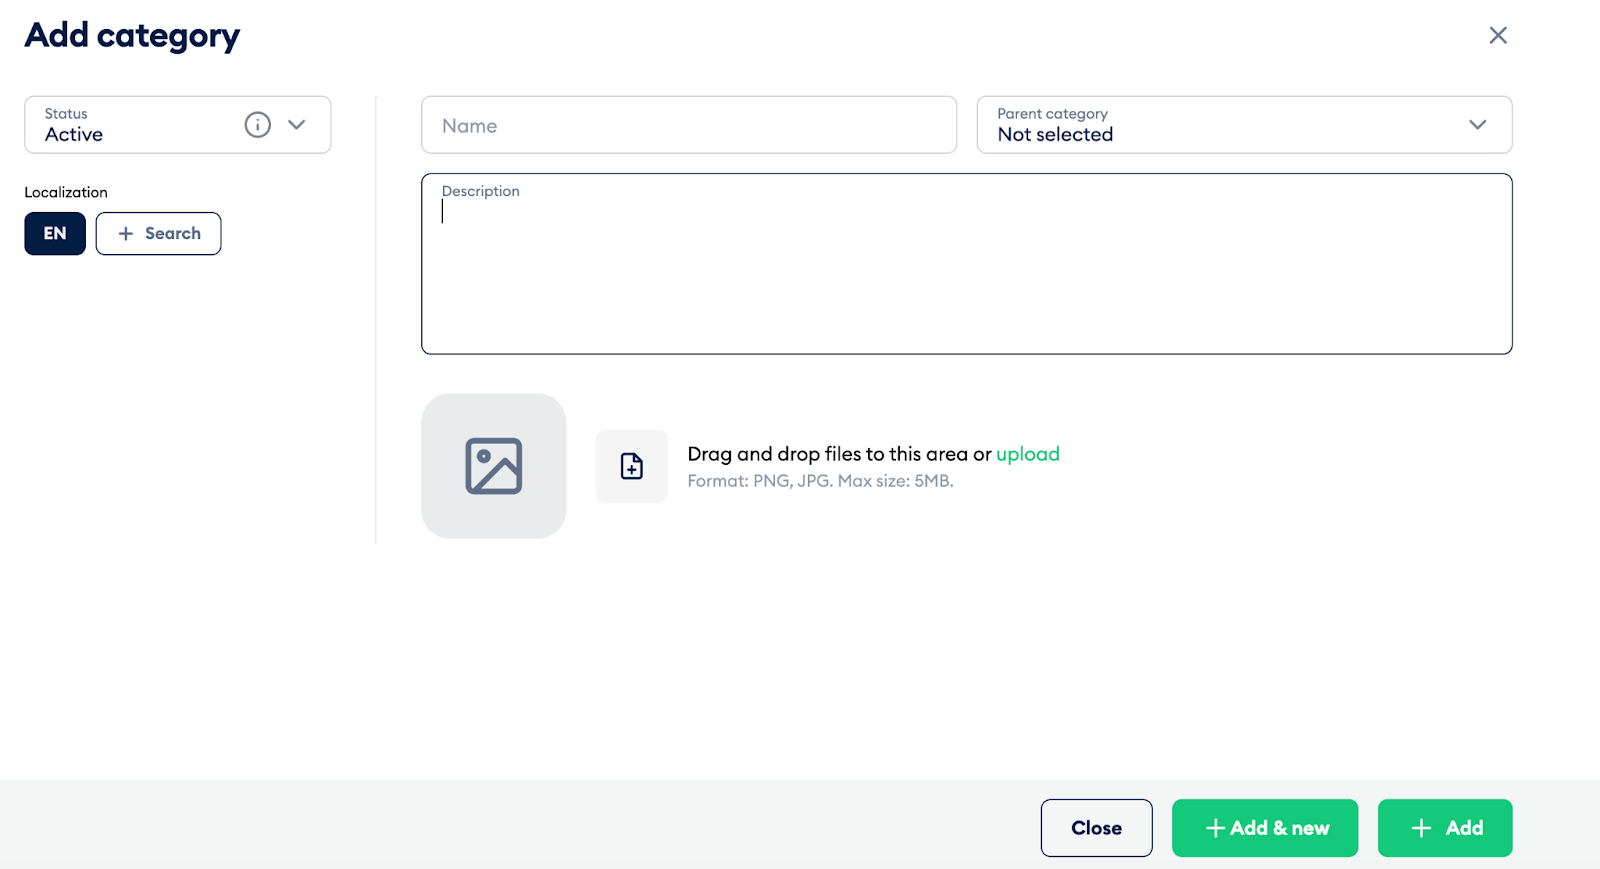
Creating Product Categories Click Category on the top left Keep status as Active (change to "Hidden" to hide from POS) Enter the Category Name Add a Description (optional) Upload Images (optional) Click ADD to save, or Add & New to create multiple categories Category Navigation Category Search Bar - Find categories quicklyAll Items - View all products you've addedNo Category - Products added without a categoryAdding Products Click Add Item Enter product details and price Click Save Editing & Deleting: Click the three dots next to any product.
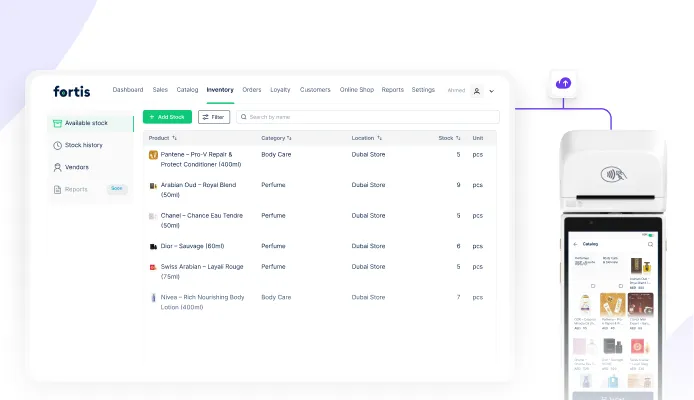
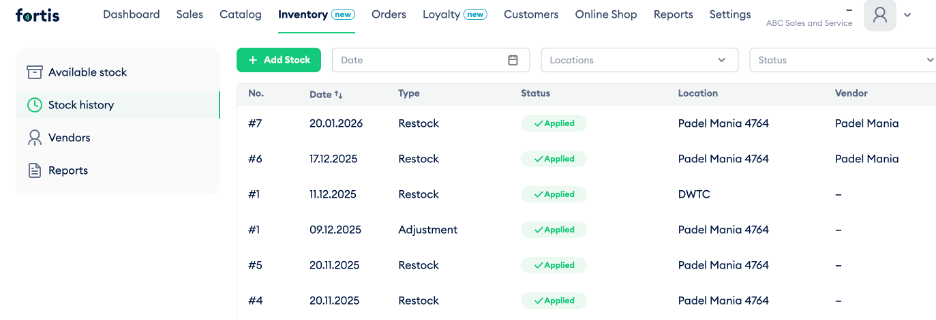
Inventory Management Keep track of your stock levels with automatic updates when sales are made.
Adding Stock Go to Inventory Click Add Stock Use Filter and Search to find items (or create new with New Product ) Click Edit Info to select Location and Vendor Adjust stock using + and - buttons in the Added Stock column Enter Unit Cost (optional, but helpful for profitability reports) Click Apply (or Save As Draft for later) Select the Location and click Add Stock Features:
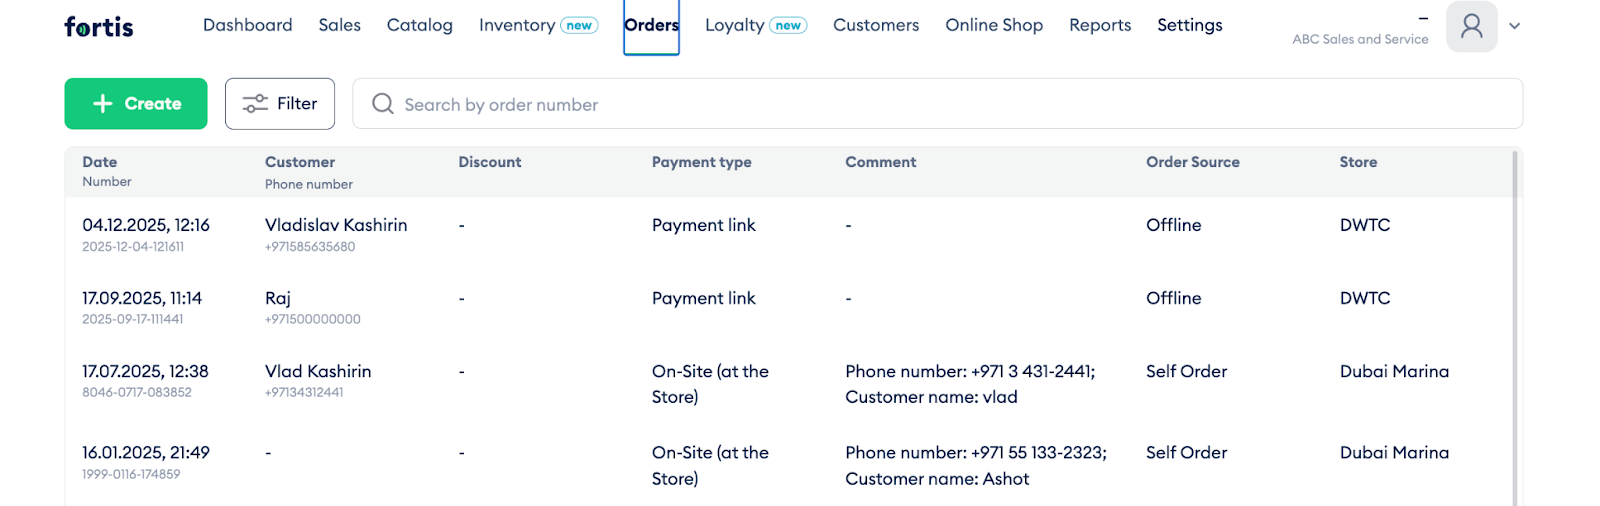
Automatic stock adjustment when sales are made Download inventory reports Vendor management available Orders Tab Create orders for customers with flexible payment and delivery options.
Creating an Order Click Create Add products to cart (you can add non-catalog items too) Click Next Select Payment Option Choose Shipping Method (delivery or pickup) Select Location (if you have multiple stores) Select the Customer Click Create Copy the payment link and share with customer Payment Link Option: Available if you've opted for PBL (Payment By Link) services.
Customer Management Build and manage your customer database for better service and tracking.
Features Add Customers - Build your customer databaseDelete Customers - Remove outdated recordsPOS Integration - Customers appear on your POS device with phone numbersOnline Shop - Add products and generate QR codes for customers
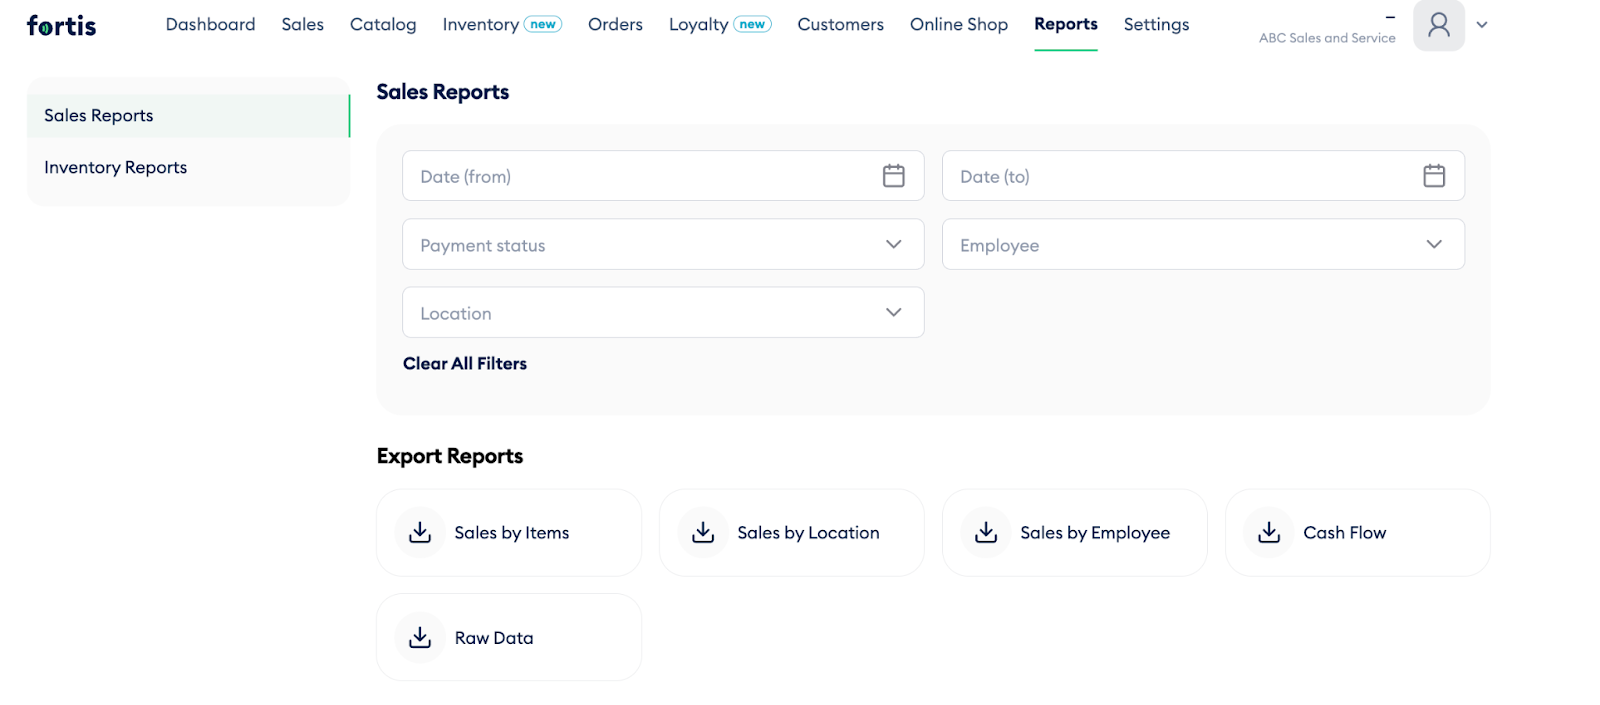
Reports Download detailed reports to analyze your business performance.
Filter Options
Date Range - Select from and to datesPayment Status - Paid, Unpaid, Refunded, Partial RefundEmployee - Filter by specific staff memberLocation - Filter by store locationClear All Filters - Reset all selectionsAvailable Reports
Sales Reports:
Sales by Items - Product performance breakdownSales by Location - Store-wise sales analysisSales by Employee - Staff performance trackingCash Flow - Financial flow overviewRaw Data - Complete unprocessed sales dataInventory Reports: Track stock levels and movement
Each report can be downloaded with your applied filters for detailed analysis.
Settings User & Location Management
Add team members and assign appropriate access levels.
User Positions & Access Levels Owner
Full access to everything including Merchant and Owner entries Can add Locations, Employees, and POS Terminals Manage Catalog, Customers, Sales, Orders, Loyalty Programs, and Discounts Administrator
Full access to view and edit database Cannot edit Merchant and Owner entries Manager
Create and edit Orders, Sales, Customers, and Catalog items View all other data (cannot edit) Cashier or Courier
View Sales, Orders, Customers, Catalog, Discounts, and Loyalty programs Cannot edit any data No access to other sensitive information Adding a New User Go to Settings tab Select the appropriate Position for the employee Complete the user form Click Add Need Help? For any questions or support, reach out to:
customer.success@fortis.world


.svg)


.svg)
